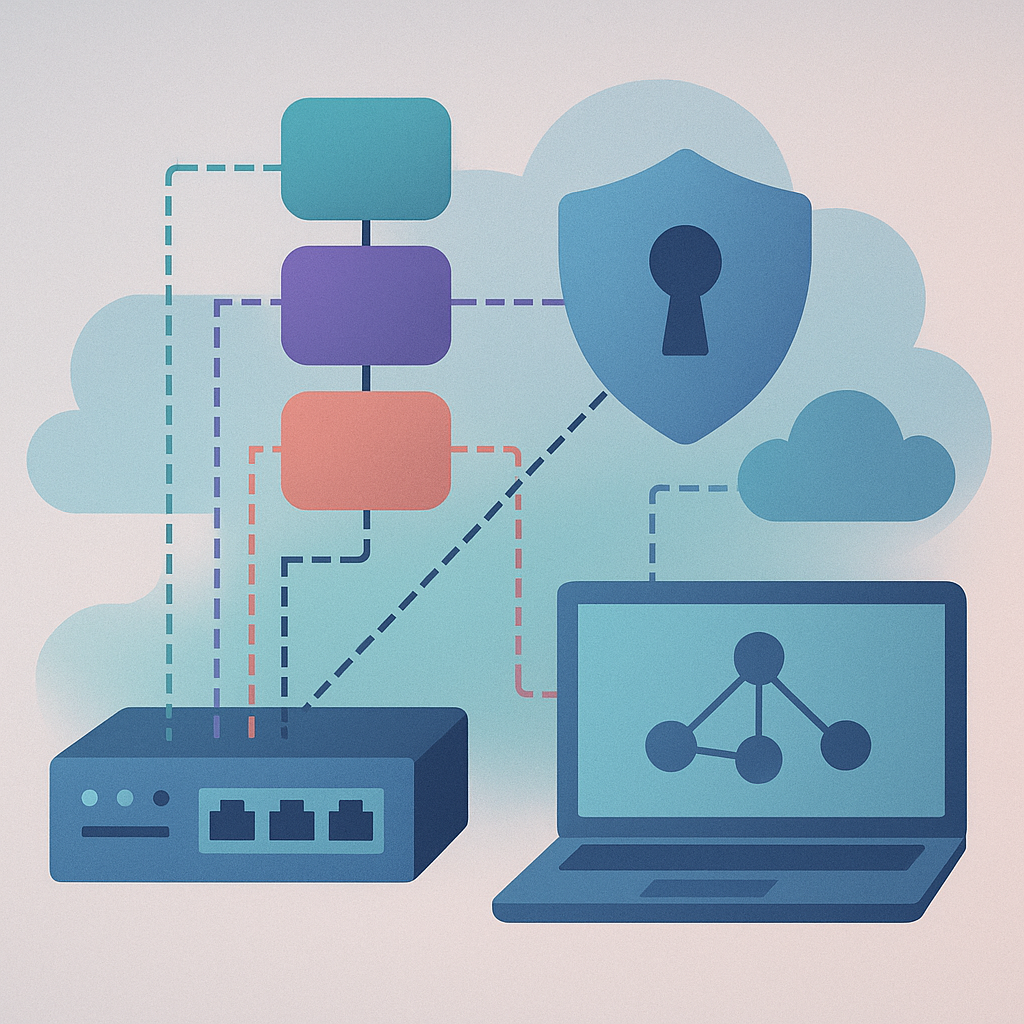
VLANs (Virtual Local Area Networks) are one of the most effective ways to segment an Ethernet network without physically separating everything into different switches and cabling. Done well, VLANs reduce unnecessary broadcast traffic, improve fault isolation, and make security boundaries clearer. Done poorly, they create outages that are hard to diagnose: loops, black holes, asymmetric routing, DHCP failures, and “it works on this switch but not on that one” behavior.
This article explains how to set up VLANs using IEEE 802.1Q tagging in a way that scales operationally. It assumes you’re an IT administrator or system engineer responsible for switching and routing in a campus, small enterprise, lab, or data center edge. The examples focus on common enterprise switch behaviors (Cisco IOS-like CLI, but conceptually transferable to other vendors) and include vendor-neutral validation steps. Where vendor syntax differs, the intent is explained so you can map it to your platform.
The flow is deliberate: first you design the VLAN plan and define where Layer 2 ends and Layer 3 begins, then you implement VLANs and trunks, then you add inter-VLAN routing and DHCP, and finally you harden and operationalize the deployment. Each step builds on the last so you end up with a working network rather than isolated configuration fragments.
VLAN fundamentals you need before touching the CLI
A VLAN is a logical segmentation of an Ethernet switching domain. Practically, it creates a separate broadcast domain, meaning ARP requests and other Layer 2 broadcasts in VLAN 10 are not flooded into VLAN 20. Hosts in different VLANs cannot communicate at Layer 2; they require Layer 3 routing (an SVI on a Layer 3 switch, or a router interface/subinterface).
VLAN membership is typically assigned per switchport. An access port carries traffic for exactly one VLAN and sends/receives frames untagged. A trunk port carries traffic for multiple VLANs by adding an 802.1Q tag (a 12-bit VLAN ID) to frames. Trunks are how you extend VLANs across switches and to routers, firewalls, or hypervisors.
Two special concepts tend to cause confusion:
First, the native VLAN on an 802.1Q trunk is the VLAN whose frames are sent untagged on that trunk. Many networks set the native VLAN to a dedicated, unused VLAN to reduce risk from untagged traffic and mismatches. If two trunk endpoints disagree about native VLAN, you can get VLAN leakage or connectivity failures that look like random packet loss.
Second, a voice VLAN (on many access switches) is a convenience feature: the port carries untagged data traffic for the PC and tagged traffic for the IP phone. It’s still just VLANs and tagging; the phone tags frames for the voice VLAN, while the attached PC typically sends untagged frames in the data VLAN.
From a performance perspective, VLANs don’t “speed up” links by themselves. They improve performance by limiting the scope of broadcasts and by enabling more intentional traffic engineering (for example, steering guest traffic to a firewall, keeping high-churn IoT chatter away from server subnets, or separating noisy lab devices from production endpoints).
Decide where your Layer 3 boundary lives
Before you create VLANs, decide where routing occurs. This choice determines how many VLANs you can carry across the network and how much Layer 2 complexity you introduce.
In a classic small network, you might have a single router doing “router-on-a-stick,” with one trunk to a switch and VLAN subinterfaces on the router. That’s workable for a handful of VLANs and modest throughput, but it can become a bottleneck because all inter-VLAN traffic traverses that trunk and the router CPU.
In most enterprise campus designs, a Layer 3 switch (or a pair for redundancy) handles inter-VLAN routing using SVIs (Switched Virtual Interfaces)—virtual Layer 3 interfaces bound to VLANs. Access switches uplink to distribution/core on trunks, but the core is typically Layer 3 between distribution blocks to limit spanning tree domains.
A useful rule: keep Layer 2 as small as practical. VLANs are Layer 2 constructs, and extending them across too many switches increases blast radius for loops and misconfigurations. If you need to keep endpoints in the same VLAN across buildings, ask whether you really need Layer 2 adjacency or whether Layer 3 plus proper services (DHCP, DNS, directory) is enough.
This boundary decision also ties directly into how you implement security controls. If VLANs route via a firewall, you can apply policy between them. If they route in a core switch, you’ll likely use ACLs on SVIs or rely on downstream firewalls for specific flows.
Plan your VLAN and IP addressing scheme
A VLAN plan is not just “pick some numbers.” You’re defining an operational model: naming conventions, IP scopes, DHCP options, routing, and how devices will move over time.
Start with the business/technical goals for segmentation. Common drivers include:
- Separating user devices from servers.
- Isolating guest Wi-Fi from internal resources.
- Splitting voice from data to prioritize RTP and simplify QoS.
- Segmenting IoT/OT devices that cannot be hardened.
- Creating lab/dev VLANs to contain broadcast-heavy testing.
Then translate those into a minimal set of VLANs with clear ownership and purpose. Over-segmentation is real: dozens of VLANs with weak documentation often make operations worse.
For each VLAN, document:
- VLAN ID and name (for humans and for consistent switch configs).
- IP subnet (IPv4 and/or IPv6), gateway, and DHCP scope.
- Where it exists (which access blocks, which trunks carry it).
- Routing policy expectations (which other VLANs it should reach).
- Security policy baseline (for example, “IoT VLAN may only reach DNS/NTP and a specific broker”).
Example scenario 1: small office with voice, data, guest
Consider a 60-person office with an ISP circuit, a firewall, and two stacks of access switches. The goals are: isolate guests, separate voice and data for QoS, and keep administration simple.
A sane initial plan might be:
- VLAN 10 “DATA” – 10.10.10.0/24
- VLAN 20 “VOICE” – 10.10.20.0/24
- VLAN 30 “GUEST” – 10.10.30.0/24
- VLAN 99 “NATIVE-BLACKHOLE” – no IP, not used for endpoints
- VLAN 100 “MGMT” – 10.10.100.0/24 (optional; for switch/AP management)
Routing happens on the firewall (router-on-a-stick), because the environment is small and you want all inter-VLAN policy enforced centrally.
The key here is that the VLAN plan already anticipates trunking (native VLAN 99), DHCP relay or firewall DHCP, and management reachability.
Configure VLANs on switches (and keep the database consistent)
On most enterprise switches, you define VLANs globally and then assign ports. Some platforms use a VLAN database; others treat VLANs as running config. In either case, the operational requirement is the same: VLAN IDs and names must be consistent across switches that participate in trunks.
VLAN names don’t impact forwarding, but they matter for humans and for avoiding mistakes during changes. Use names that reflect function, not location, unless your model is location-based.
A Cisco IOS-like example:
conf t
vlan 10
 name DATA
vlan 20
 name VOICE
vlan 30
 name GUEST
vlan 99
 name NATIVE-BLACKHOLE
vlan 100
 name MGMT
end
write memory
On some vendors you’ll also want to ensure that VLAN creation is present on all switches that will carry the VLAN on trunks. If you prune VLANs later (recommended), it becomes even more important that you explicitly allow only the intended VLANs on each trunk.
Configure access ports correctly (data, voice, and edge protections)
Access ports connect to endpoints: PCs, printers, APs (sometimes trunked), phones, cameras, and building systems. Misconfiguring access ports is one of the fastest ways to create “only some devices work” incidents.
For a plain endpoint (PC/printer) you typically set:
- Switchport mode access
- Access VLAN
- Edge STP behavior (PortFast / edge)
- Optional security controls (storm-control, port-security, 802.1X)
Example:
bash
conf t
interface range gi1/0/1-24
 switchport mode access
 switchport access vlan 10
 spanning-tree portfast
 spanning-tree bpduguard enable
end
write memory
PortFast (or vendor equivalent) reduces time to forwarding state for edge ports, which improves client DHCP and boot behavior. BPDU Guard helps shut down a port if it unexpectedly receives BPDUs, which is a common sign of someone connecting a switch and creating a loop.
Voice VLAN access ports
Voice deployments commonly use a phone with a built-in two-port switch: the phone uplinks to the wall, and the PC plugs into the phone. The phone tags voice traffic and leaves PC traffic untagged.
Example:
bash
conf t
interface gi1/0/10
 switchport mode access
 switchport access vlan 10
 switchport voice vlan 20
 spanning-tree portfast
 spanning-tree bpduguard enable
end
write memory
This port carries two VLANs, but operationally it’s still an access edge port with a designated voice VLAN. Your QoS strategy must align with this (e.g., trusting DSCP/CoS from the phone, not the PC).
Example scenario 2: warehouse IoT plus office users
In a mixed environment (warehouse scanners, cameras, badge readers, plus office laptops), VLANs help prevent unstable IoT devices from flooding the same broadcast domain as user devices.
A practical pattern is:
- VLAN 10 “OFFICE-DATA” – user laptops/desktops
- VLAN 40 “IOT” – cameras, scanners, badge readers
- VLAN 100 “MGMT” – switch/AP management
Access ports in the warehouse get VLAN 40 and stricter controls like storm-control and DHCP snooping (discussed later). Office ports remain in VLAN 10 with 802.1X if available. The performance gain is less about throughput and more about limiting broadcast/ARP noise and isolating failure modes: a misbehaving camera no longer impacts office endpoints.
Build trunks between switches (802.1Q) deliberately
Trunks are where VLAN designs succeed or fail. A trunk is not “just make it a trunk.” You need to decide:
- Which VLANs should be allowed on that trunk.
- What the native VLAN should be.
- Whether the trunk should negotiate (DTP) or be statically set.
- How you’ll prevent accidental loops.
A conservative configuration is to statically set trunking, set a dedicated native VLAN, and explicitly allow only the VLANs needed on that link.
Example:
bash
conf t
interface gi1/0/49
 description Uplink-to-Distribution1
 switchport trunk encapsulation dot1q
 switchport mode trunk
 switchport trunk native vlan 99
 switchport trunk allowed vlan 10,20,30,100
 spanning-tree guard root
end
write memory
Notes that matter operationally:
- Some platforms don’t require
switchport trunk encapsulation dot1q(or don’t support ISL at all). Use what your hardware supports. allowed vlanis the simplest form of VLAN pruning. It reduces accidental exposure and shrinks the effective Layer 2 domain.- Root guard helps prevent an access/distribution boundary from accidentally becoming STP root due to a mispatch.
If you’re trunking to an access point, you might allow a management VLAN plus one or more SSID VLANs. If you’re trunking to a hypervisor, you might allow tenant VLANs and a management VLAN. In both cases, “allow only what you need” is the safest baseline.
Native VLAN strategy
The native VLAN exists because 802.1Q was designed to interoperate with untagged Ethernet. In modern environments you want to minimize untagged traffic on trunks.
A common practice is:
- Set native VLAN to a dedicated VLAN (like 99) that has no endpoints.
- Ensure native VLAN matches on both ends.
- Avoid using VLAN 1 for anything meaningful.
Some vendors also support tagging the native VLAN (sending it tagged as well). If you enable that, you must ensure both ends agree; otherwise, you’ll black-hole untagged traffic or cause mismatches.
Verify VLAN and trunk state before adding routing
Validation early prevents you from debugging Layer 3 symptoms caused by Layer 2 miswiring.
At this stage you should verify:
- VLANs exist on both switches.
- Access ports are in the expected VLAN.
- Trunks are up, in trunking mode, and carrying the right VLANs.
- The native VLAN matches.
Examples (Cisco IOS-like):
bash
show vlan brief
show interfaces trunk
show spanning-tree vlan 10
Interpretation matters. For example, a trunk can be “up” but not carrying a VLAN due to an allowed VLAN mismatch. Similarly, STP can be blocking a trunk for a given VLAN, which looks like partial connectivity. Checking show spanning-tree vlan X helps you see whether the path is forwarding.
Implement inter-VLAN routing: SVIs vs router-on-a-stick
Once VLANs exist and can traverse trunks, you decide how endpoints will communicate across VLANs and reach upstream networks.
Option A: inter-VLAN routing on a Layer 3 switch (SVIs)
An SVI is a virtual interface bound to a VLAN. Hosts in that VLAN use the SVI IP as their default gateway.
Example (core/distribution switch):
bash
conf t
ip routing
interface vlan 10
 description DATA gateway
 ip address 10.10.10.1 255.255.255.0
 no shutdown
interface vlan 20
 description VOICE gateway
 ip address 10.10.20.1 255.255.255.0
 no shutdown
interface vlan 30
 description GUEST gateway
 ip address 10.10.30.1 255.255.255.0
 no shutdown
end
write memory
With ip routing enabled, the switch routes between these VLANs in hardware (on most enterprise gear), which is typically high throughput and low latency.
You still need an upstream default route (or dynamic routing) from this Layer 3 switch to the rest of the network/firewall, and return routes back.
Option B: router-on-a-stick with VLAN subinterfaces
Router-on-a-stick uses a single physical interface as an 802.1Q trunk, with one logical subinterface per VLAN.
Example (router):
bash
conf t
interface gigabitEthernet0/0
 no shutdown
interface gigabitEthernet0/0.10
 encapsulation dot1Q 10
 ip address 10.10.10.1 255.255.255.0
interface gigabitEthernet0/0.20
 encapsulation dot1Q 20
 ip address 10.10.20.1 255.255.255.0
interface gigabitEthernet0/0.30
 encapsulation dot1Q 30
 ip address 10.10.30.1 255.255.255.0
end
write memory
On the switch port facing the router, configure a trunk that allows those VLANs and uses the agreed native VLAN.
Router-on-a-stick is perfectly valid when:
- Total inter-VLAN throughput is modest.
- You want centralized policy enforcement (often the firewall plays this role).
- Hardware constraints make L3 switching unavailable.
The tradeoff is that all inter-VLAN traffic funnels through a single link/device, so size it carefully.
Provide DHCP correctly across VLANs
DHCP is where many VLAN deployments appear to “half work.” Clients can link up but fail to get an IP because DHCP broadcast messages don’t cross VLAN boundaries.
You have three common approaches:
1) Run a DHCP server in each VLAN (rare outside small labs). 2) Run a centralized DHCP server and use a relay on the default gateway. 3) Let a firewall/router provide DHCP per VLAN.
In enterprise environments, option 2 is common: Windows Server DHCP or an appliance provides scopes, and the SVI (or router subinterface) relays requests to it.
DHCP relay on SVIs
On Cisco IOS-like devices, DHCP relay is ip helper-address.
bash
conf t
interface vlan 10
 ip helper-address 10.10.100.10
interface vlan 20
 ip helper-address 10.10.100.10
interface vlan 30
 ip helper-address 10.10.100.10
end
write memory
The DHCP server at 10.10.100.10 must have scopes for each VLAN subnet and be reachable from the routing device. Also confirm that any firewall between the relay and the DHCP server permits UDP 67/68 and related relay behavior.
DHCP options and VLAN-specific requirements
Voice VLANs often need DHCP optioning (for example, option 66/150 depending on phone vendor) to find call manager/TFTP. Guest VLANs often need different DNS servers or a captive portal redirect. Planning these details up front reduces later “mystery failures” where only phones or only guests have issues.
To validate DHCP end-to-end, don’t just check that a client receives an address. Confirm:
- Correct gateway and DNS.
- Lease comes from the right scope.
- The client can reach required services (DNS resolution, NTP, domain controllers, etc.) consistent with your policy.
Example scenario 3: campus distribution with centralized DHCP
Imagine a campus with multiple access closets, each with its own access switch stack, and a pair of distribution switches doing inter-VLAN routing. DHCP runs on Windows servers in a data center VLAN.
The implementation pattern is:
- VLANs are present on access switches and trunked up to distribution.
- SVIs live on distribution switches.
- Each SVI has an
ip helper-addresspointing to the DHCP servers. - Distribution has routing adjacency to core/data center.
Operationally, when a new access closet is added, you extend trunks to distribution and ensure the correct VLANs are allowed. You do not need to deploy a DHCP server in each closet, and you don’t need to stretch Layer 2 across buildings beyond what’s required for that closet.
Control broadcast and loop risk with spanning tree and pruning
VLANs reduce the size of broadcast domains, but they do not prevent Layer 2 loops. In fact, adding trunks increases the ways a loop can be introduced.
Spanning Tree Protocol (STP) prevents loops by blocking redundant paths. Modern networks typically use RSTP (Rapid STP) or vendor variants. The exact mode (PVST+, Rapid-PVST, MST) depends on your vendor and scale.
The key operational points are:
- Ensure a deterministic STP root (usually distribution/core).
- Use edge port settings (PortFast) on endpoints.
- Use protections like BPDU Guard on edge ports.
- Avoid extending VLANs unnecessarily, since STP operates per VLAN or per instance depending on mode.
VLAN pruning via trunk allowed VLAN lists also reduces STP complexity, because fewer VLANs need to compute topology over that trunk.
If you have multiple distribution switches with redundant uplinks, consider whether you want Layer 2 redundancy (STP blocking) or Layer 3 redundancy (routing with ECMP) at that boundary. Many modern campus designs prefer Layer 3 uplinks from access to distribution to avoid large STP domains, but that changes how you “set up VLANs” because VLANs terminate at access and routing begins there.
Add security controls that align with VLAN boundaries
VLANs are not a security control by themselves; they’re a segmentation primitive. Real security comes from enforcing policy at Layer 3/4 and controlling who can attach at the edge.
That said, VLAN deployments are a natural place to implement foundational protections because the configuration already touches access ports, trunks, and gateways.
Inter-VLAN policy: ACLs and firewalling
Where you route between VLANs is where you can enforce policy. If SVIs on a Layer 3 switch perform routing, apply ACLs on SVIs or route VLAN traffic through a firewall using design patterns like “default route to firewall” or policy-based routing (if your platform supports it and you truly need it).
A simple but effective approach is to implement a “default deny between sensitive VLANs” stance and open only required flows. For example:
- Guest VLAN: allow DNS/DHCP to infrastructure, allow outbound internet, deny RFC1918 internal.
- IoT VLAN: allow to specific controllers/brokers, deny to user VLANs.
- Management VLAN: restrict to admin jump hosts.
Avoid building enormous ACLs directly on access switches unless your platform and operational model support it; complexity tends to grow quickly. If a firewall is available, pushing policy there is often easier to audit.
Layer 2 protections: DHCP snooping, DAI, and IP source guard
Many campus switches support:
- DHCP snooping: marks trusted ports (uplinks to DHCP server/relay) and blocks rogue DHCP servers on untrusted access ports.
- Dynamic ARP Inspection (DAI): uses DHCP snooping bindings to block ARP spoofing.
- IP Source Guard: restricts traffic to the IP/MAC learned via DHCP snooping.
These features are vendor-specific in syntax and have prerequisites (for example, DHCP snooping must be enabled per VLAN and uplinks must be trusted). If you enable them, do it methodically and monitor impact on devices with static IPs, printers, and phones.
An illustrative Cisco IOS-like baseline (validate commands for your platform and software train):
bash
conf t
ip dhcp snooping
ip dhcp snooping vlan 10,20,30,40,100

interface gi1/0/49
 description Uplink-to-Distribution1
 ip dhcp snooping trust

interface range gi1/0/1-48
 ip dhcp snooping limit rate 15
end
write memory
This is intentionally conservative: it enables snooping on selected VLANs, trusts only the uplink, and rate-limits DHCP on edge ports to reduce DHCP starvation attacks and accidental storms.
Management VLAN and secure device access
A management VLAN is useful when you want switch/AP management interfaces separate from user traffic. If you do this, also ensure:
- Management interfaces are not reachable from guest or untrusted VLANs.
- Admin access is via SSH with strong authentication, ideally from jump hosts.
- SNMP is v3 where possible, and telemetry is scoped.
The VLAN itself is only part of the story; routing and ACLs determine who can actually reach that management subnet.
Integrate wireless and virtualization cleanly
VLANs frequently intersect with Wi-Fi and hypervisors. If you don’t plan for that integration, you end up with VLANs that exist “on paper” but can’t be consumed by APs or VMs.
Wireless SSIDs mapped to VLANs
Most enterprise wireless designs map each SSID to a VLAN. That VLAN may be tunneled to a controller (central switching) or bridged locally at the AP (local switching), depending on architecture.
The switch port to an AP is often a trunk:
- Native VLAN: AP management (sometimes untagged)
- Tagged VLANs: SSID client VLANs
Be explicit about allowed VLANs to APs. Carrying every VLAN to every AP is rarely necessary and expands risk.
Hypervisors and VM networks
If you trunk VLANs to a hypervisor host, you’re effectively extending those VLANs into a virtual switch. Ensure consistency between:
- Physical switch trunk allowed VLAN list.
- Hypervisor vSwitch/port group VLAN IDs.
- The upstream gateway placement.
If a VM needs to live in VLAN 200, that VLAN must exist end-to-end: physical trunk(s), virtual port group, and routing gateway. Missing any link in that chain results in silent connectivity failure.
Validate end-to-end: L2, L3, and services
Once VLANs, trunks, routing, and DHCP are configured, validate in layers to avoid misattributing issues.
Start with Layer 2:
- Endpoint link is up.
- Endpoint is in correct VLAN (port config).
- MAC address is learned in correct VLAN.
On many switches:
bash
show mac address-table vlan 10
show interfaces status
Then Layer 3:
- Endpoint gets correct IP, gateway, DNS.
- Can ping its gateway.
- Can ping across VLANs where allowed.
- Can reach upstream networks.
Then services:
- DNS resolves internal and external names as designed.
- NTP reachable (especially important for phones and authentication).
- Application flows match policy.
When validating cross-VLAN reachability, use the routing device as a vantage point. For example, from a distribution switch SVI, ping a host and trace routes to confirm path symmetry. If you’re enforcing inter-VLAN policy on a firewall, verify the firewall sees the sessions and that return traffic routes back through the same device.
Keep VLAN sprawl under control with documentation and change discipline
VLANs can accumulate over years: a temporary lab VLAN that became permanent, an acquisition subnet, a one-off printer VLAN. Sprawl increases trunk allowed lists, increases STP instances (depending on mode), and makes it harder to reason about security.
Operationally, treat VLANs like any other shared infrastructure object:
- Maintain a source of truth (NetBox, IPAM, or even a well-maintained repo) for VLAN ID, name, subnet, gateway, DHCP scope, and where it’s allowed.
- Standardize VLAN naming and reserved ranges (e.g., 10–99 campus user/voice, 100–199 management/infrastructure, 200–299 server, etc.).
- Use templating/automation where possible to reduce drift between switches.
Even without full automation, a consistent “VLAN request” checklist helps: why the VLAN exists, what needs access, where it’s trunked, what the security policy is, and who owns it.
Performance considerations: where VLANs help and where they don’t
It’s common to frame VLANs as “enhanced network performance.” The more accurate statement is: VLANs help you manage broadcast containment, failure isolation, and policy-driven traffic flows, which indirectly improves perceived performance and reliability.
VLANs help when:
- Broadcast and unknown unicast flooding is high due to many endpoints or chatty protocols.
- You can isolate high-churn devices (IoT, lab gear) from business-critical clients.
- You can steer traffic through the right security and WAN egress points.
VLANs don’t help when:
- The real bottleneck is uplink bandwidth, oversubscribed WAN, or a slow firewall.
- You’re saturating a router-on-a-stick trunk with inter-VLAN traffic.
- Application latency is dominated by server-side processing or remote dependencies.
If you’re routing inter-VLAN traffic on a firewall, be conscious of how much east-west traffic you’re forcing through it. In the warehouse scenario, for example, if IoT devices continuously stream video to on-prem NVR servers in a different VLAN and you hairpin through a firewall, you may overload the firewall. In that case, you might route in a Layer 3 switch with ACLs and only send north-south traffic to the firewall.
Similarly, if you implement many VLANs and extend them across the whole campus, STP convergence events can look like performance issues (brief outages). Reducing the Layer 2 domain size—by limiting VLAN stretch and using Layer 3 boundaries—often yields a more stable network.
Putting it together: a practical implementation sequence
At this point, you have all the building blocks. The safest way to implement VLANs in a live environment is to stage changes so that each step is verifiable.
Start by implementing VLAN definitions and naming consistently on the switches involved. Then configure access ports for a small pilot set of endpoints. Next, configure trunks with explicit allowed VLANs and a dedicated native VLAN, and verify trunk state. After that, add routing (SVIs or router subinterfaces) and confirm gateways respond. Then implement DHCP (server scopes and relay) and validate client leases.
Only after basic connectivity works should you tighten security controls like DHCP snooping/DAI and inter-VLAN ACLs, because those controls can break edge cases (static IP devices, legacy endpoints) if introduced without inventory and testing.
To make this concrete, revisit the small-office scenario: you can bring up VLAN 10 first, move a few test ports to it, and verify internet and internal access. Then add VLAN 20 for phones with the appropriate DHCP options and QoS trust model. Then add VLAN 30 for guest Wi-Fi, verify it can reach only the internet, and confirm internal RFC1918 ranges are blocked. By incrementally expanding, each new VLAN inherits a validated trunking and routing foundation.
Command-line snippets for common verification tasks
Verification commands vary by vendor, but the concepts are universal: confirm membership, confirm trunks, confirm forwarding state, and confirm routing.
On a Cisco IOS-like switch, these are commonly useful:
bash
show vlan brief
show interfaces switchport gi1/0/10
show interfaces trunk
show spanning-tree summary
show spanning-tree vlan 10
show mac address-table dynamic vlan 10
show ip interface brief | include Vlan
show ip route
On a Linux host connected to an access port, you can sanity-check VLAN behavior from the endpoint side. For example, confirming you’re untagged on an access port:
bash
ip link show
ip addr show
ip route
If you intentionally connect a Linux host to a trunk for testing (only do this if you understand the risk), you can create a VLAN subinterface:
bash
sudo ip link add link eth0 name eth0.10 type vlan id 10
sudo ip addr add 10.10.10.50/24 dev eth0.10
sudo ip link set eth0.10 up
ping -c 3 10.10.10.1
This is a practical way to confirm that tagged VLAN 10 is actually traversing a trunk to where you think it is.
Design extensions: when VLANs aren’t enough
As environments grow, you may outgrow “classic VLANs everywhere” for reasons that are more about operations and scale than basic functionality.
If you need to extend Layer 2 across a data center at scale (for example, large virtualized clusters), overlays like VXLAN may be used. VXLAN encapsulates Layer 2 over Layer 3, allowing large-scale segmentation without giant spanning tree domains. That said, VXLAN is a different architecture and not a direct replacement for understanding how to set up VLANs; it builds on the same mental model of segmentation and gateways.
Similarly, microsegmentation at the host/workload layer (policy enforced by agents or hypervisor) can complement VLANs. VLANs still provide coarse segmentation and a clean place to apply network services (DHCP, DNS, routing), while microsegmentation handles east-west policy inside a VLAN.
Treat these as extensions rather than shortcuts. A well-designed VLAN and routing foundation makes these advanced architectures easier, because you already have consistent IPAM, naming, and boundary definitions.